Adobe Sign
Estimated Reading Time: 3 MinutesADOBE SIGN
Here are instructions to use Adobe Sign with either Adobe Acrobat Pro or the web version ( a part of Adobe Creative Cloud available to Clemson users). These three options will be covered:
- Instructions to use Adobe Acrobat Pro to send a document to another user for their signature
- Instructions to use Adobe Acrobat Pro to add your signature to a document
- Instructions to use the web version of Adobe Acrobat to send a document to another user for their signature
USE ADOBE ACROBAT PRO TO SEND A DOCUMENT TO ANOTHER USER FOR THEIR SIGNATURE
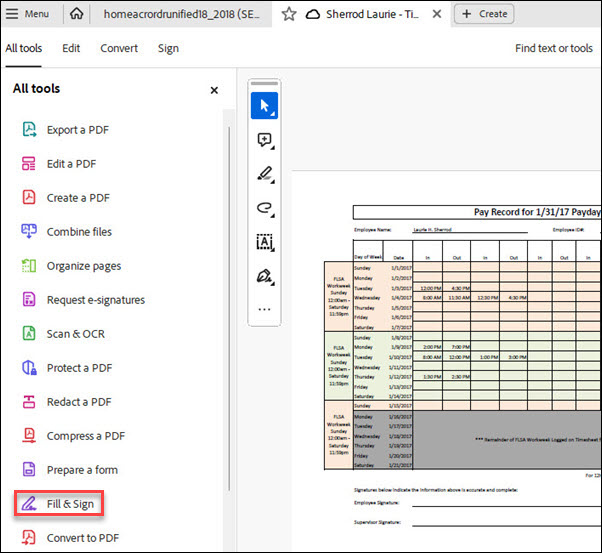
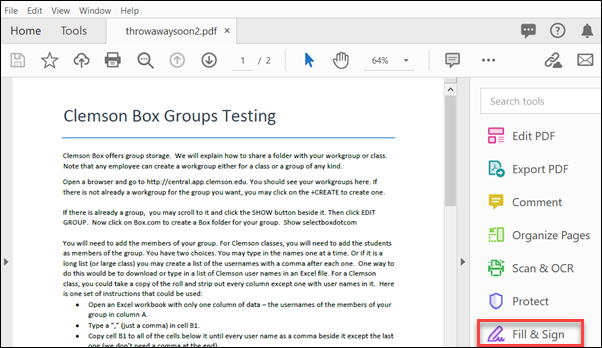
1. Open Adobe Acrobat Pro DC and open a document.
2. Select Fill & Sign from the menu on the left side.
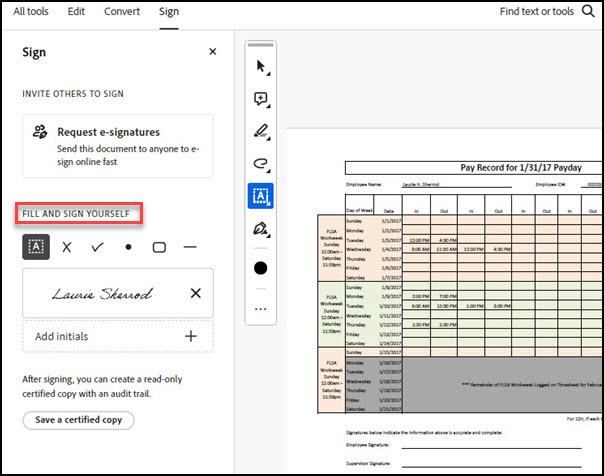
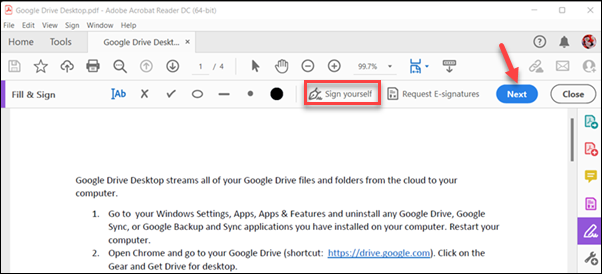
3. Under FILL AND SIGN YOURSELF, add signature or initials. Drag your signature to position in document.
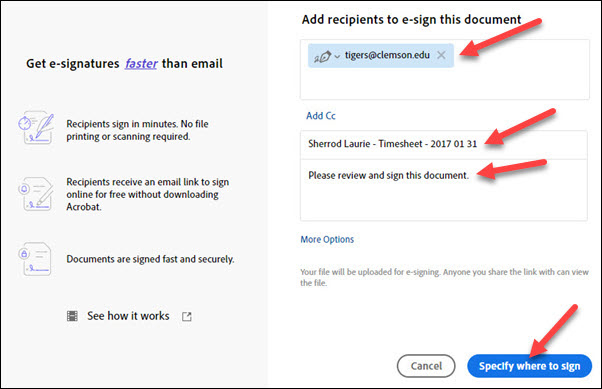
4. Under Recipients add the recipient email address.
5. Under Add fill in a message to be sent to recipient.
6. Click on Specify Where to Sign.
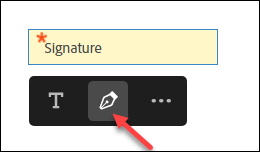
7. Click on the location in the document where you want the recipient to add a signature. Click on the pen to specify that it is a signature field.
8. Click Send.

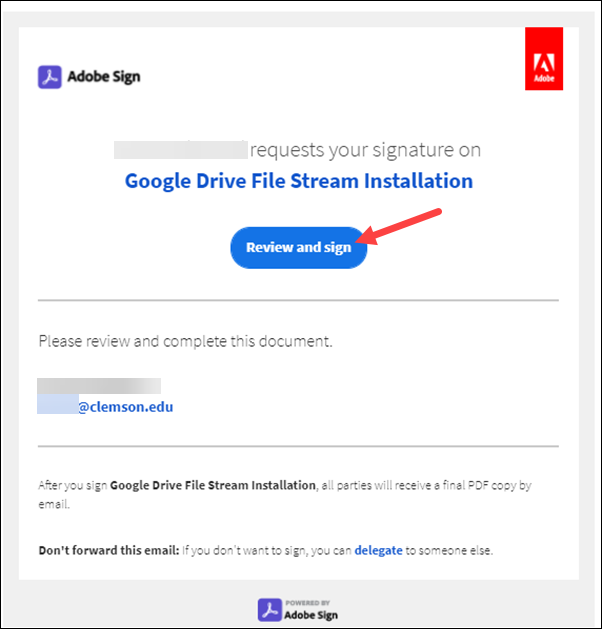
9. Your recipient will get an email. He will need to click on Review and sign in the message.
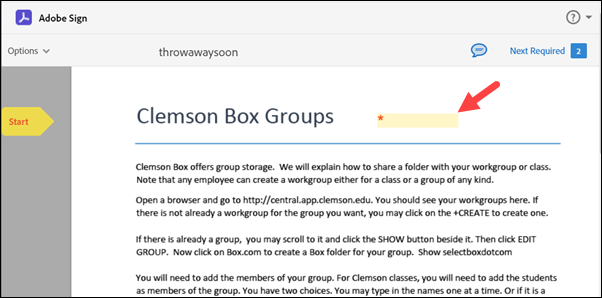
10. He may need to click on Start, and then click in the signature box.
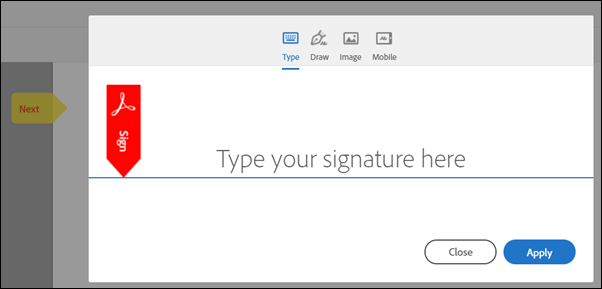
11. He will see a typing or drawing box. He will need to type his signature here or may draw it if desired. Then he should click Apply.
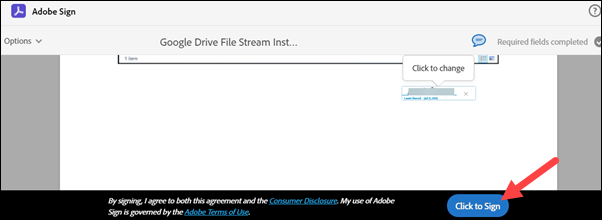
12. He will click on the blue Click to Sign at the bottom of the screen.
13. Your recipient will receive the message "You're all set" and an option to download a copy of what he just signed.
14. You will get an email saying your recipient has signed the document.
SIGN YOUR OWN PDF IN ADOBE ACROBAT PRO
1. Open Adobe Acrobat Pro and open the document.
2. Select Fill and Sign from menu on left side of the screen.
3. Select Sign yourself, Your Signature or Add Initials, drag to where you want it, click on the spot, and select Next at the top of the screen.
4. Select Save as a read-only copy, click Continue, select a folder, and Save.
ADOBE SIGN ON THE INTERNET (REQUESTING A SIGNATURE FROM THE RECIPIENT).
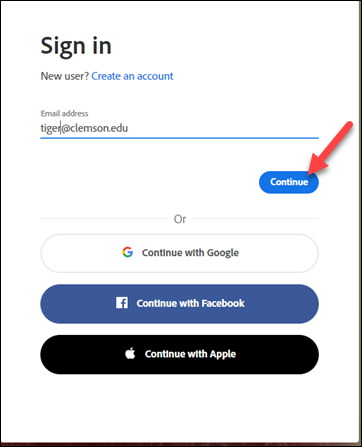
1. Open a browser and go to this site https://documentcloud.adobe.com and sign in using your Clemson username@clemson.edu. Click Continue,
2. If asked, select Company or school account, enter your Clemson credentials, and click Login.
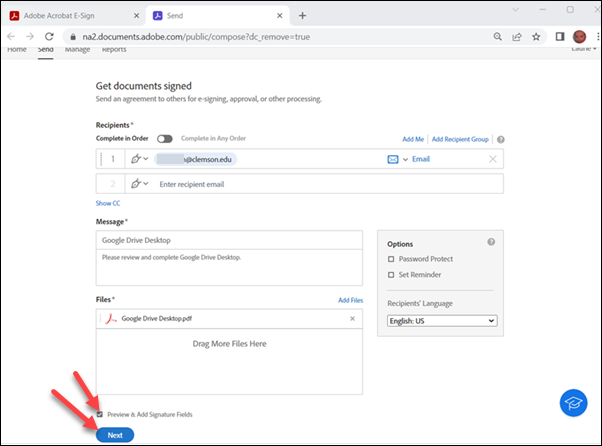
3. Click on E-Sign, Request e-Signatures.
4. Enter recipient email and Message.
5. Add file(s) for signature.
6. Put a checkmark next to Preview and & Add Signature fields.
7. Click Next.
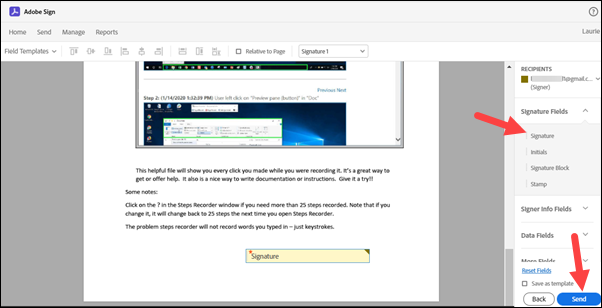
8. Drag and drop Signature field (from right side of screen) into document. You will see the yellow signature box.
9. Click Send.
10. You will get a message that your document was sent successfully.
11. Your recipient will get an email with a link he needs to click on that says Review and sign.
12. He will need to click on Start.
13. He will need to click on the signature box.
14. He will need to type in his name.
15. He will need to click Apply.
16. He will need to click on Click to sign.
If you have more questions, email ITHELP@clemson.edu or call 864-656-3494.