HOW TO: OneDrive for Business – Managing Files in OneDrive
Estimated Reading Time: 4 MinutesFiles can be managed in MS OneDrive using several features including downloading, uploading, sharing, organizing, and more.
- Go to office365.clemson.edu.
- Log in using your Clemson email (username@clemson.edu) as your username.
- Your password is the same one you use for iRoar and Canvas.

- On the Office 365 home page you should see some of the applications available to you. You may also click on the nine dots in the upper left corner to see all available apps.
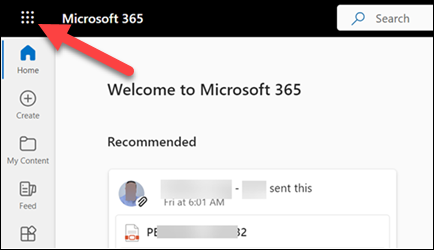
- Click on OneDrive.
.png)
- Move your mouse over the file or folder that you want to select.
- Click the check mark in the circle to the left of that file or folder.
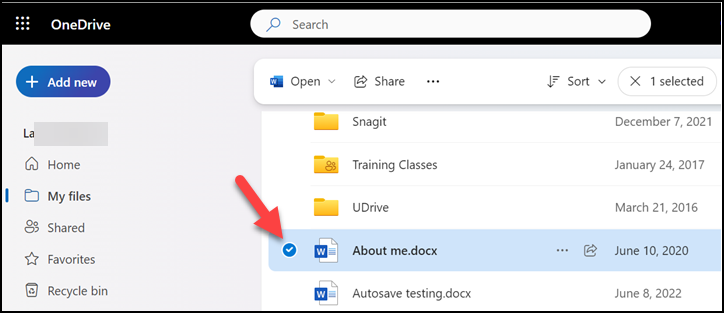
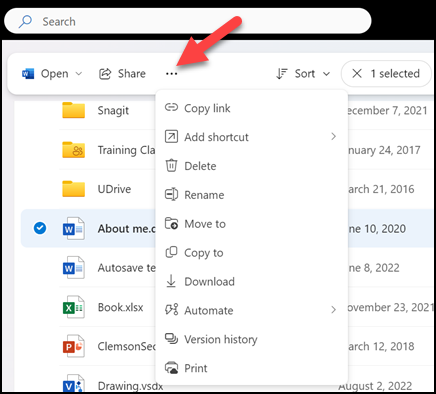
- Options available now will appear below the search box as shown below. These options all apply to the selected file or folder only. Click on ... to see all of the options for that file or folder.
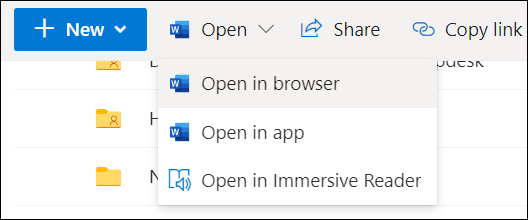
1. Open:
To open a selected .docx file in MS Word Online or MS Word on your computer:
- Select Open.
- Then choose your preference. Open in Browser opens a new browser tab and opens the file in the online version of Word. Open in App opens the MS Word installed on your computer and opens the file in that. In either case, changes will automatically be saved in OneDrive.
- Or click on the file to open it in the Browser (same as above). Note you have most of the features of your app MS Word in the browser version.
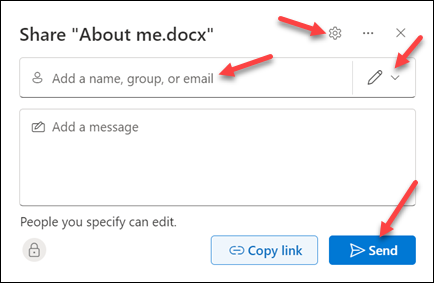
2. Share:
- Fill in the Email addresses of the people with whom you want to share and click on the pencil to select one of the share settings. Add an optional message and then click Send. For more settings click on the gear in the upper right.
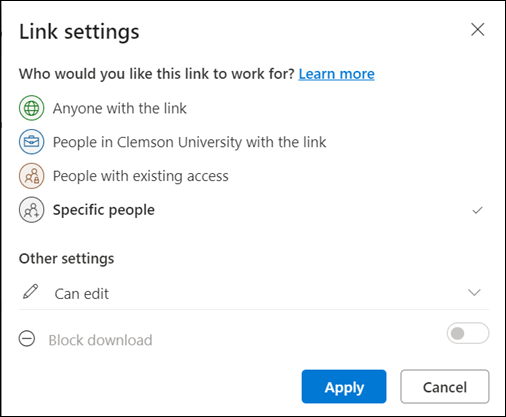
- If you click on Settings, you will see these options. Each will have additional settings you can specify.
3. Copy Link:
The Copy Link option can be used to share a link to your file that you previously selected.
Note: With this link you can give direct access to your file (Read-Only or Edit) or use the link to access it directly yourself (Read-Only or Edit).
The link is copied. But to change the Settings, click on the gear.
.png)
4. Download:
With the download option, you can have the selected file downloaded to your computer. Note the original will stay in OneDrive, and a copy of it will be downloaded to your computer.
- To do this click Download.
5. Delete:
To Delete a file:
- Select Delete. You will be asked to verify that you want to Delete the file or folder.
Warning: Deleted items go to the Recycle bin. See this article to read more about the OneDrive Recycle bin.
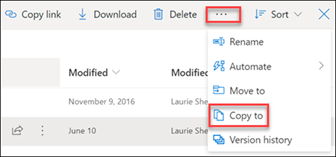
6. Copy to:
To copy a file over to a folder:
- Click to select a file
- Click Copy to (you may need to click … to see this and other options)
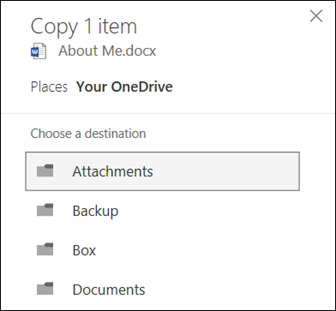
- It will ask where to copy to, select Your OneDrive.
- Then you will get a choice of all of your folders and subfolders. Select the one you want and click Copy Here.
7. Move to:
This works exactly the same as Copy to in #6 above. The difference is the file is in both the original location and the new location with Copy to. With Move to, the file is removed from the old location and now is only in the new location.
8. Rename:
This option lets you change the name of your file.
9. Version History:
This option lets you see old versions and go back to an older version if necessary. Note: old versions are only kept for 30 days.
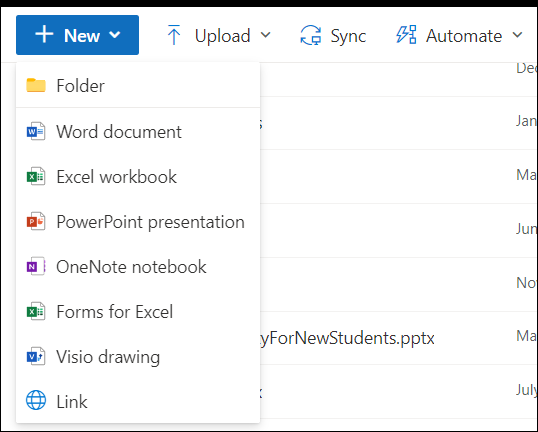
NEW FOLDER OR DOCUMENT
If you deselect any items (or have none selected), the menus are different. From here you can select New or Upload to create or add a new document
1. New:
Click New, then chose Folder or the type of document you want to create.
2. Upload:
Click on Upload, choose Files or Folder, and search your computer for the file or folder to upload. (Note: you must deselect any files or folders you have selected to see the Upload button.)
Click here for an article on first and second stage Recycle Bin in MS OneDrive.
If you have more questions, email ITHELP@clemson.edu or call 864-656-3494.
For more questions on MS OneDrive, email ITHELP@clemson.edu or call 864-656-3494.