PaperCut Printer Setup for Macs (manual setup via AirPrint)
Estimated Reading Time: 1 MinutesIf you prefer to use the manual method, proceed with these instructions:
MANUAL PAPERCUT SETUP - MAC OS
These steps are for manually setting up your Mac to print to the PaperCut system via AirPrint.
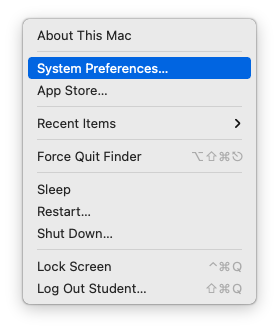
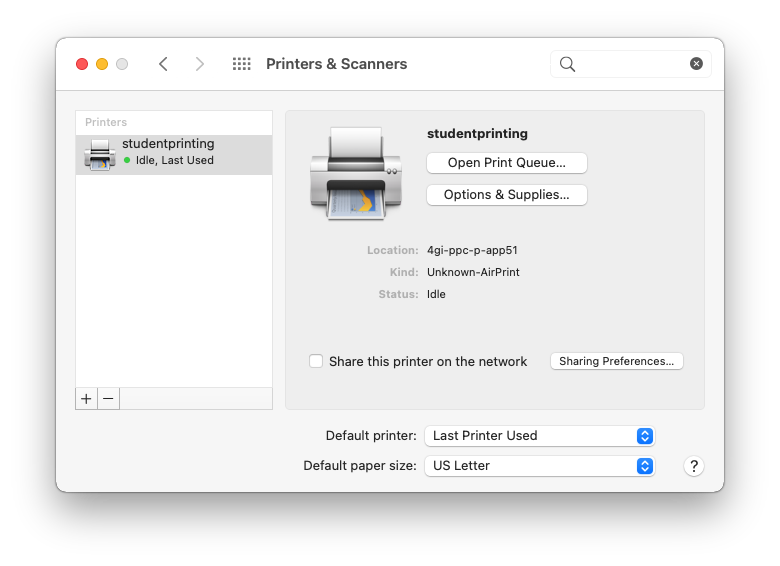
Click on the Apple in the top left corner of the screen and select System Preferences.
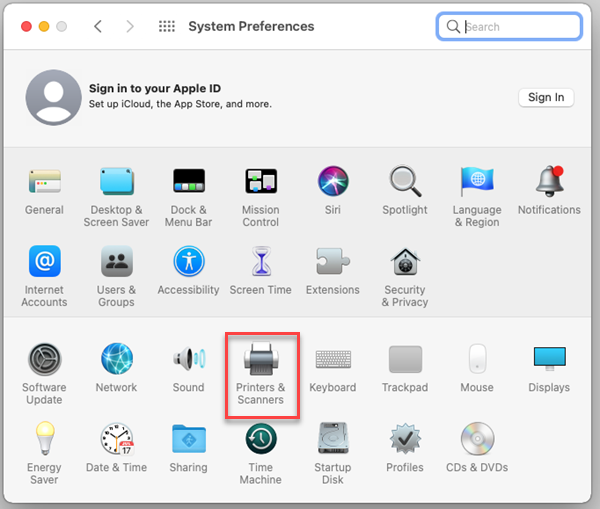
Then click on Printers & Scanners.
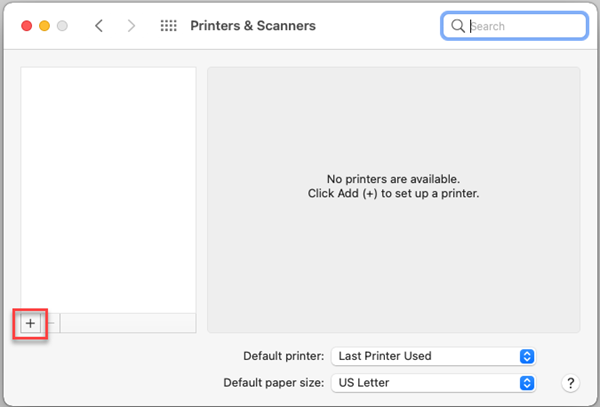
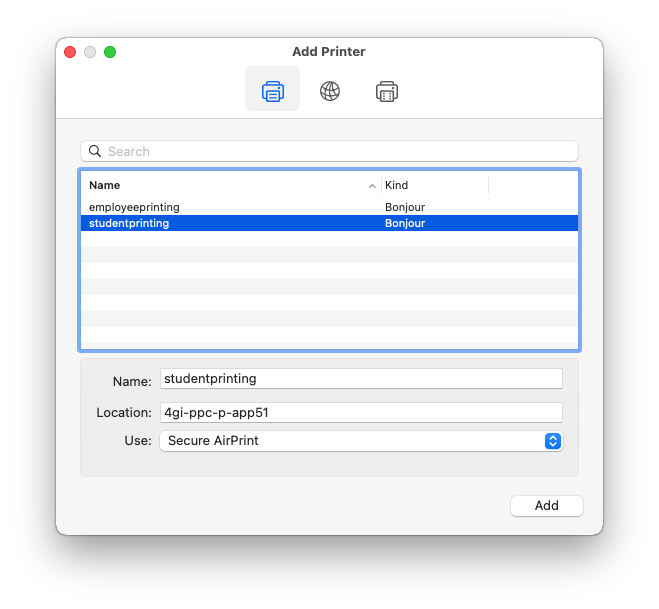
Click the + button in the bottom left corner to add a printer.
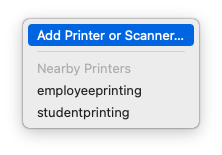
For students, select studentprinting. For employees, select employeeprinting.
Click Add.
The printer should now be installed properly.
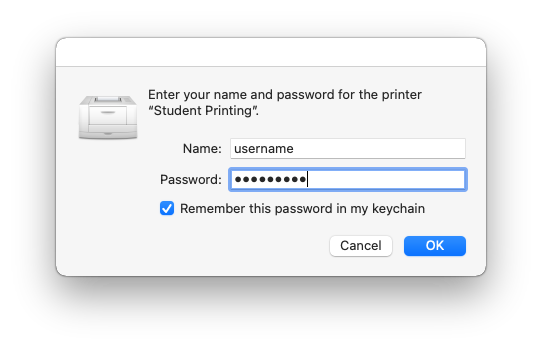
When printing for the first time, an authentication prompt should appear. Be sure to change the account name to your Clemson University username and enter your password. Check Remember this password in my keychain so that you do not have to enter it every time you print in the future and click OK.
Go to a PaperCut printer and swipe your TigerOne card to release the print.
To see your print job queue, go to https://papercut.clemson.edu and log in.
To see the PaperCut Card Reader article, click here.
PAPERCUT PLOTTERS
Click here for help with common printing issues on a Mac.
If you experience any issues, please contact CCIT Support Center at 864-656-3494, ithelp@clemson.edu or https://support.clemson.edu