How to Secondary Calendar in Outlook Exchange
Estimated Reading Time: 1 MinutesSHARING A SECONDARY CALENDAR
In addition to your default Microsoft Office Outlook Calendar, you can create and share secondary Outlook calendars.
In addition to creating a second calendar you may also want to share this second calendar with other people.
The topic of creating and sharing a second calendar with other people is covered here.
There are two basic steps in the process:
1. Create a new calendar.
2. Share the calendar with others.
CREATE A NEW CALENDAR
1. Open Outlook. Select Calendar.
2. From the Folder tab click New Calendar.
3. In the Folder window, click New Calendar.
Enter the name of the new calendar. In this example the new calendar is named Vacation Schedule. Now Click OK.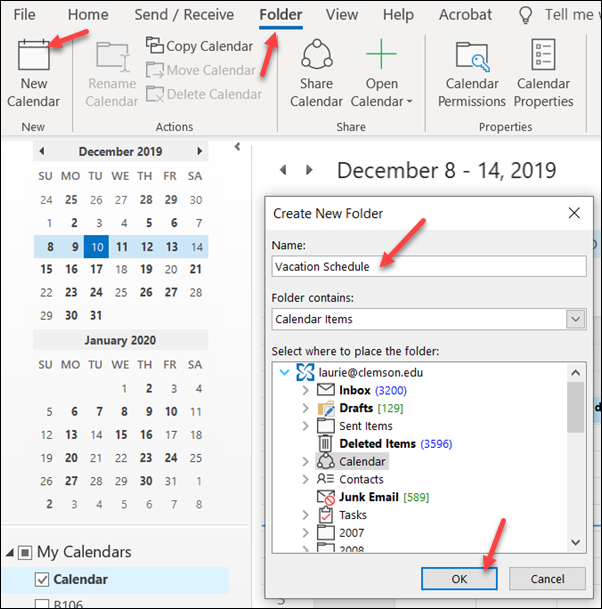
5. Once the new calendar is created it will appear in the Navigation Pane in the Calendar view.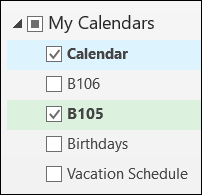
SHARE THE CALENDAR WITH OTHERS
1. Before sharing the calendar, add one item to it (sharing will not be available on a calendar that does not have at least one entry).
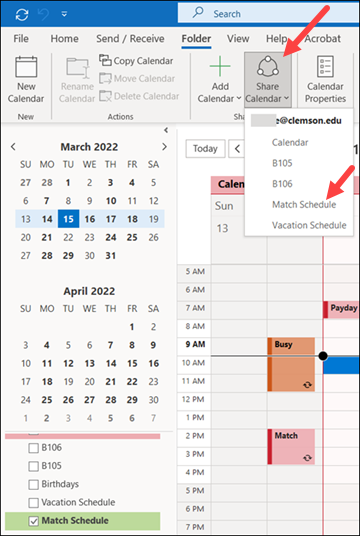
2. Click on Share Calendar and select the name of the calendar you want to share.
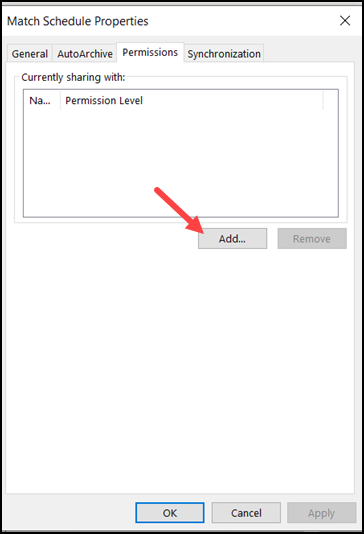
3. The properties for the calendar will open. Under Permissions, click Add.
4. Put in a name in the search box, click on the correct name, then click the OK button.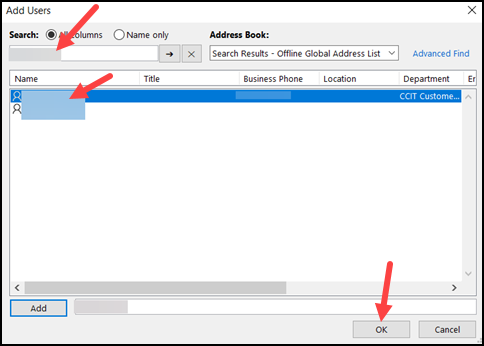
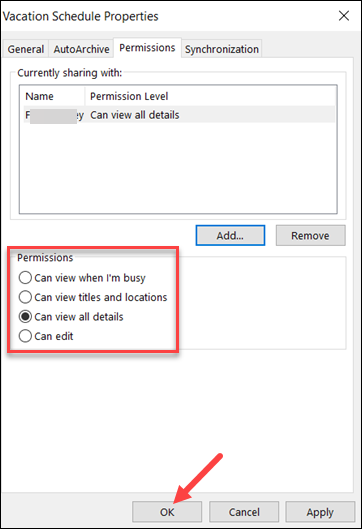
5. Select the permission level you want, and then click OK.
6. When the recipients receive the email notifying them that have access to this calendar they will click Accept button at the top of the email.
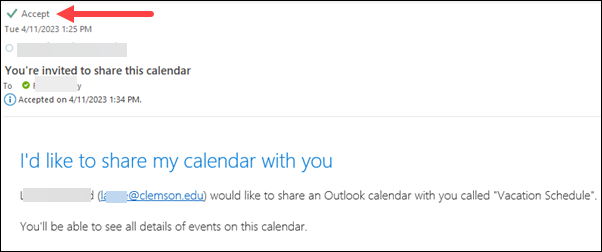
7. The calendar will now appear in the Navigation Pane in the Outlook Calendar of the Clemson user with whom you shared the calendar.
If you have more questions, email ITHELP@clemson.edu or call 864-656-3494.