PowerPoint Presenter Mode
Estimated Reading Time: 2 MinutesPresenter mode in PowerPoint allows you to see the slide you are showing to your audience along with some additional information your audience does not see. Included are your notes, the next slide, zooming, inking, and more. This will work on campus any time you have your laptop connected to a projector or second monitor.
WINDOWS
With your PowerPoint presentation open, click on Slide Show and click on the box beside Presenter View.
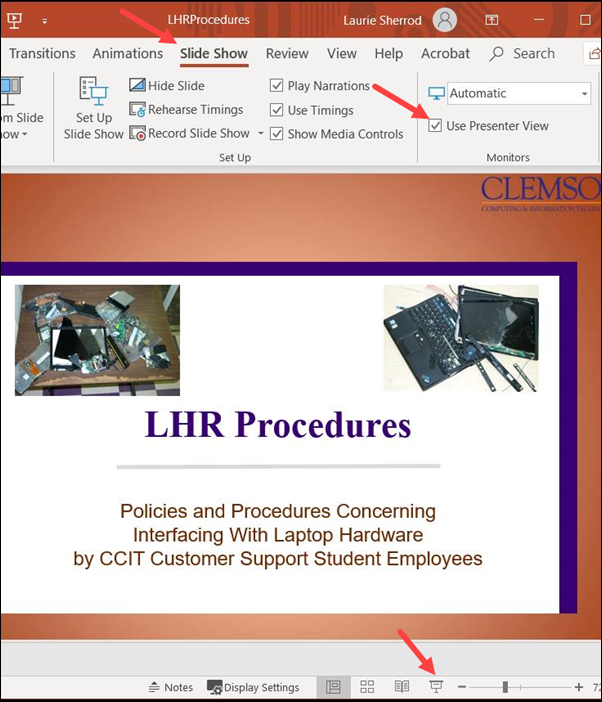
To begin the Slide Show, click on the projector icon on the lower right side of the screen. Then hover over the three dots at the bottom of the screen and select Show Presenter View.

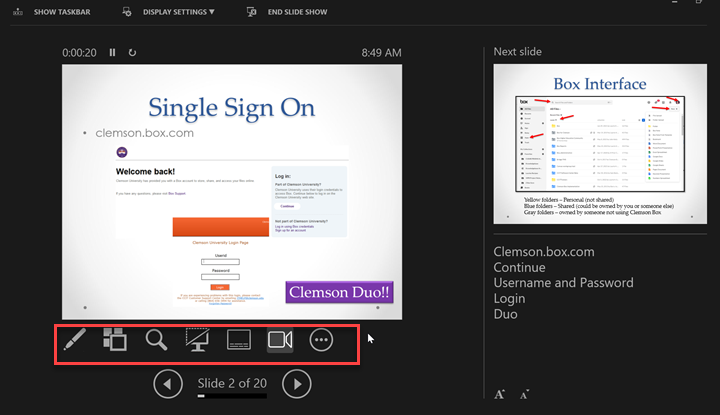
With Presenter mode turned on, your audience will see just the slides in slideshow mode (via the projector or monitor you are sharing). You will see the slide show on the left, the next slide in your deck on the right, and your notes in the box on the lower right. On the left, under the slide, you will see some tools to show all slides (so you can quickly change slides without going through all of them), zoom to a part of a slide, annotate (write on your slide), temporarily black it for your audience, three dots for more options. Under those tools, you will see arrows to allow you to go forward or backward through your deck. You can also navigate through your desk using the normal mouse/keyboard options.
MAC
If you are using Mac PowerPoint, the options are very slightly different.
If you click on Slide Show, Presenter View, the presenter view will open on the current slide.
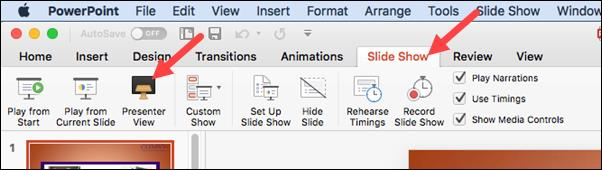
On a Mac, the Presenter View looks like this. The presenter will also see navigation arrows, the next slide or event, and the notes. The audience connected to a projector or second monitor will only see the slide.

If you have more questions, email ITHELP@clemson.edu or call 864-656-3494.