Adding an Authorized User
Estimated Reading Time: 1 MinutesStudents are permitted to add authorized users to their account that may have an interest in their financial records. Authorized users can be granted varying levels of access to the student’s account to include the ability to view the student’s tuition bill, make a payment, enroll in a payment plan or retrieve 1098-T tax information.
To add a new Authorized User, the owner of the account should follow the below steps:
1. Go to iRoar and log in. Once you do, it should look like this.You will need to click on the Student Billing tab.
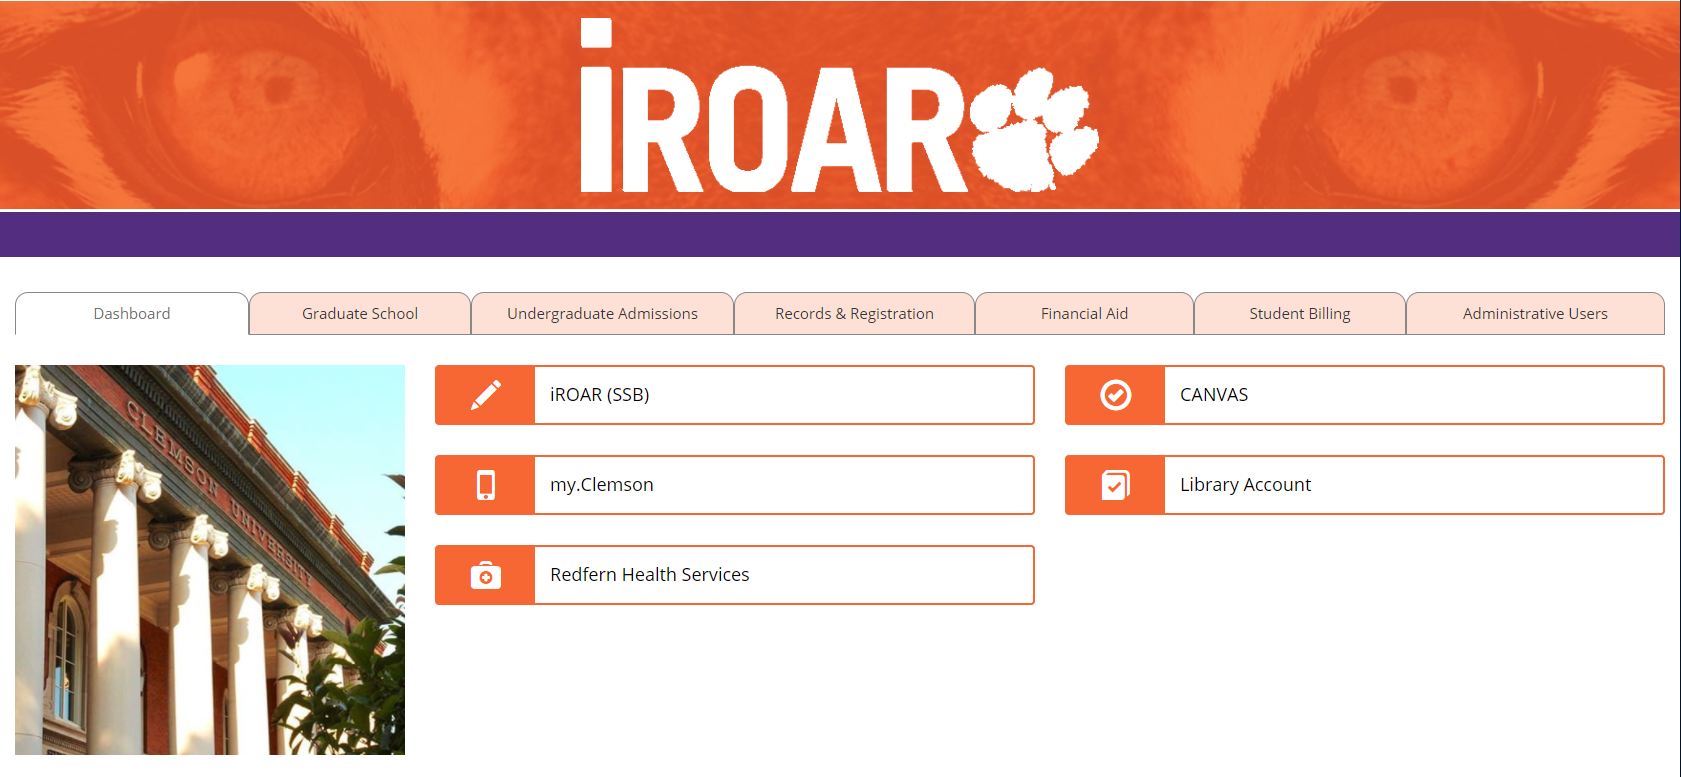
From there, click on the button that says My Bill and this should bring you to Touchnet (our billing system).

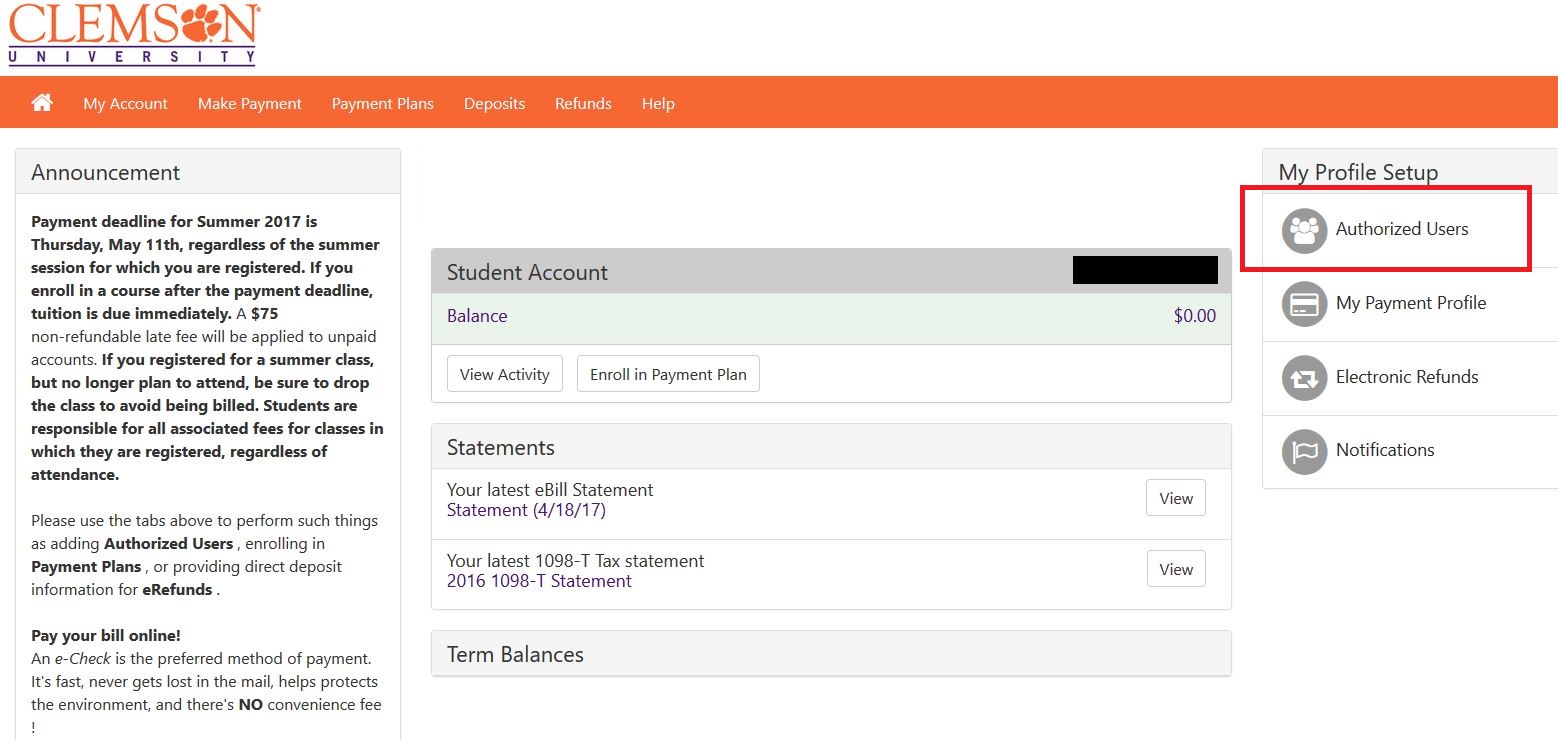
2. Once in Touchnet, click on the Authorized User tab on the right hand side.
3. You should now be able to add an authorized user by inputting the appropriate email address. There are default options selected that show what the authorized user will have access to. You can adjust these as you see fit.
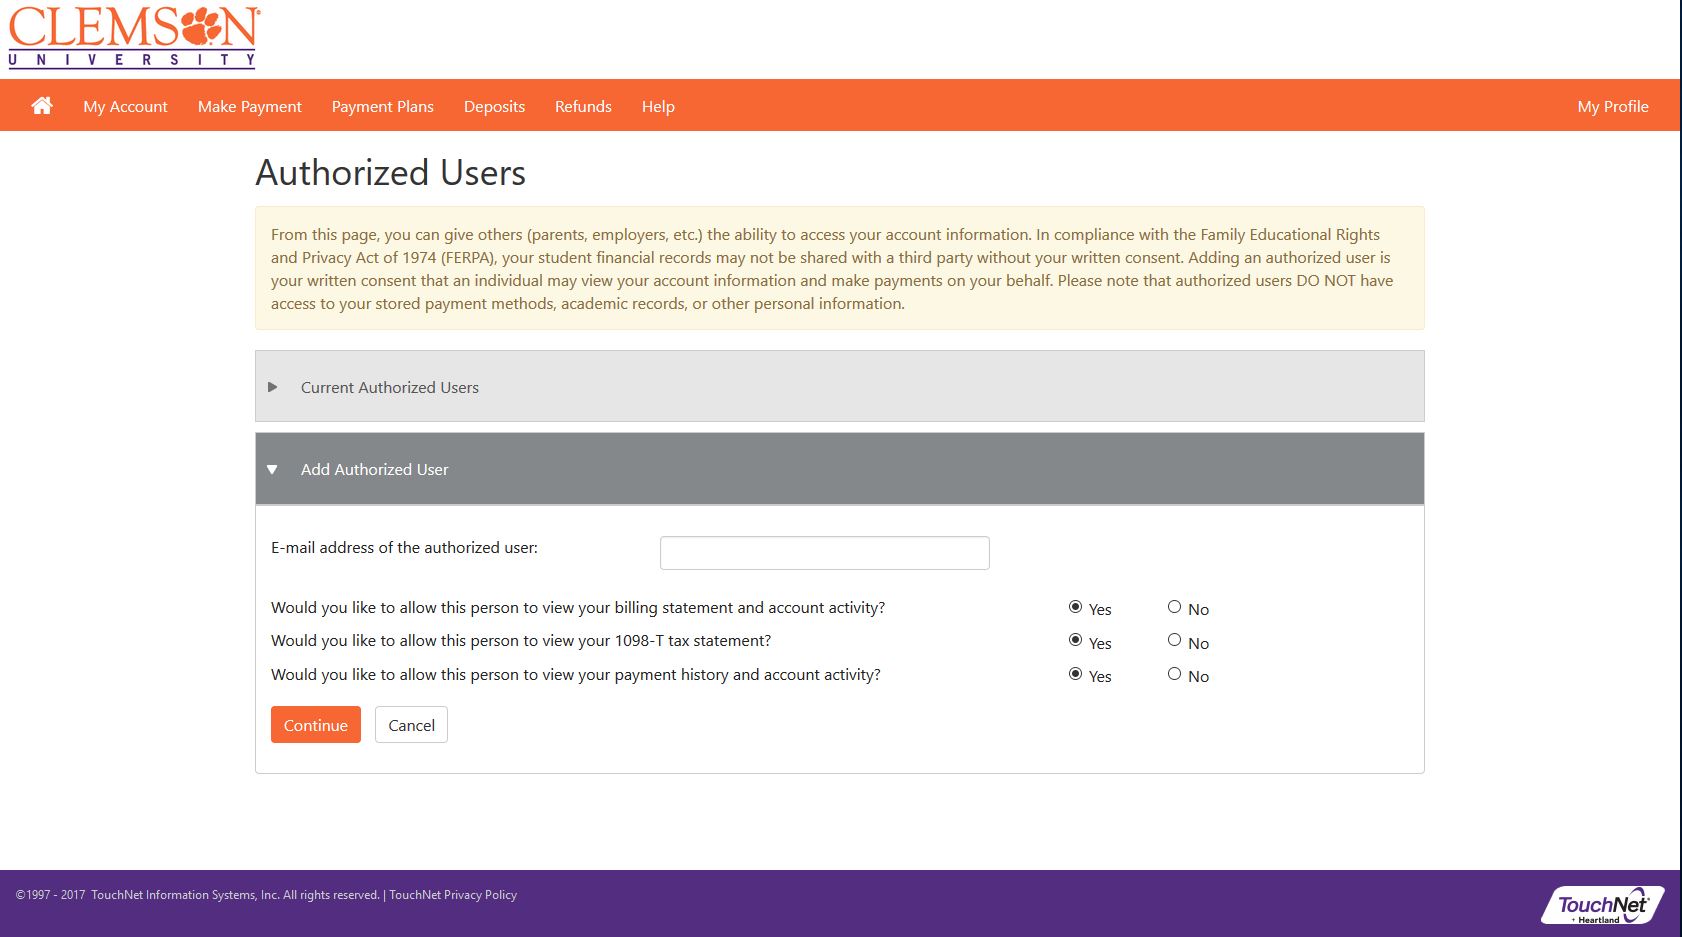
4. Click Continue and the following agreement should appear:
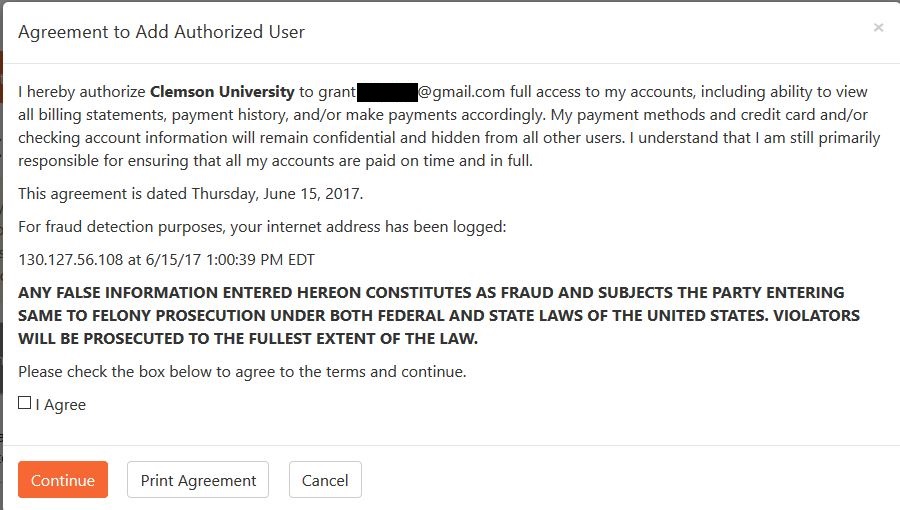
5. Check the "I Agree" box and select Continue.
Once you have done this, the user you have authorized will receive an email notifying them, and it will contain their login information. The setup should now be complete.
The parent may then log in using their email address and password that they have created at the following address: https://secure.touchnet.net/C20569_tsa/web/login.jsp