How to turn a PowerPoint into a video to upload to YouTube
Estimated Reading Time: 3 MinutesYou can turn your PowerPoint into a video file that you can upload to the cloud (YouTube, Clemson Box, Kaltura, or Google Drive). We will give instructions for creating the video from PowerPoint, and then uploading to the cloud options.
POWERPOINT
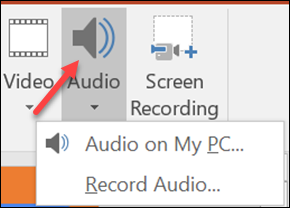
First, open your PowerPoint. You have two choices. You can just have your viewers look at the slides (no audio, but with a timing you select) or you can narrate your slides (record audio on each slide). To add audio, go to each slide and select Insert, (Media), Audio. Here there are two choices. You can select Audio on my PC or Record Audio. If you have already created the narrations using an audio recorder (such as the free program Audacity), you can select Audio on My PC and select the .mp3 files from here. Or you can select Record Audio and speak into your microphone to record it.
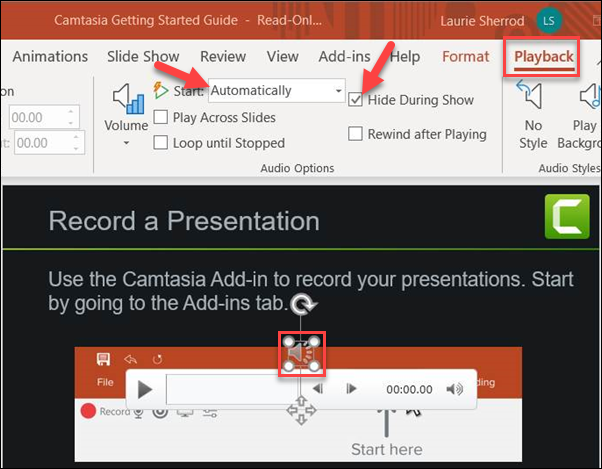
When you add audio to a slide, it will leave a mic icon on the slide. It is recommended that you "hide" the icon. To do this click on the audio icon in the middle of the slide, then select Audio Tools, Playback and put a checkmark in Hide During Show. If you want to make a video, you may want to set it to start Automatically (although you should test that to see if it is what you want).
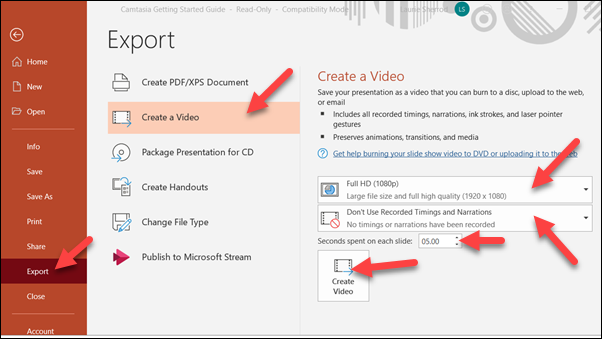
Next, select File, Export, Create a Video. Select your Full HD 1080p (the higher the quality, the larger the file and the more difficult to upload). If you have added narrations (audio), you can select Use Recorded Timings and Narrations. If you don't have narrations, you can select Don't User recorded Timings and Narrations and select a number of seconds to leave each slide on the screen. Click Create Video. It will take a while depending on how big your file is.
Once the file is made, you can upload to the cloud and get a link to share with others.
Note: If you want to use YouTube, you will need your own Google account since Clemson Google accounts do not allow uploading to YouTube.
Other options are to upload to Google Drive, Google Photos, or Clemson Box. In all cases you can open the video and get a link to share.
YOUTUBE
If you want to share your video using YouTube, you must first log in to a non-Clemson Google or YouTube account. Clemson Google accounts do not allow uploading to YouTube. Once you have done that, you can go to https://www.youtube.com/upload to upload your video. Once it is uploaded, you will be given a link to your video. Be sure to set the permissions appropriate for sharing.
CLEMSON BOX
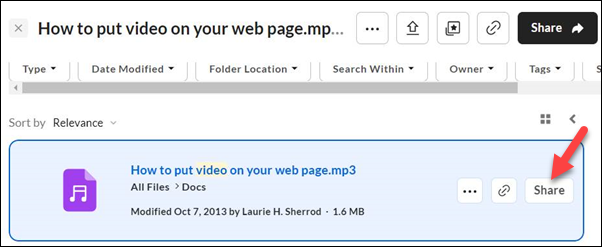
Upload your video to https://clemson.box.com. Select your video.
Click on the Share button.
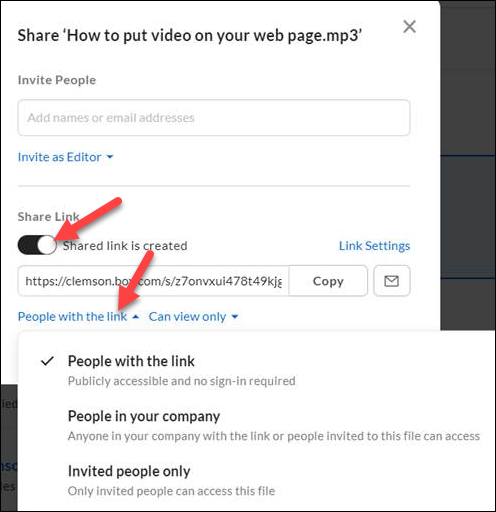
Click on Share Link to enable shared link. Then click on People with the link (or the option that suits your needs).
Click on Copy.
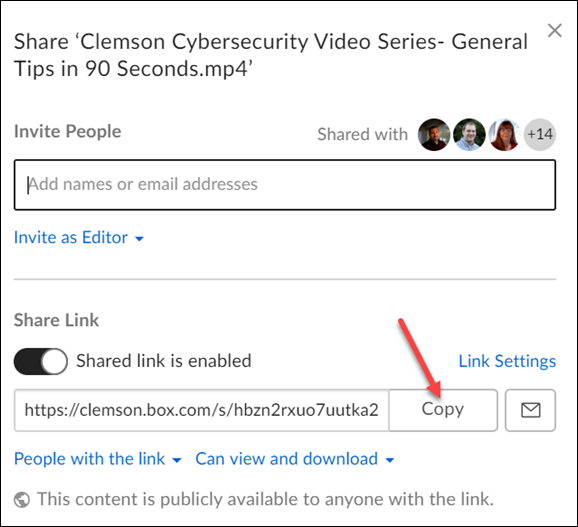
Now you may paste this link in an email or on a page where you want to share the video.
GOOGLE DRIVE
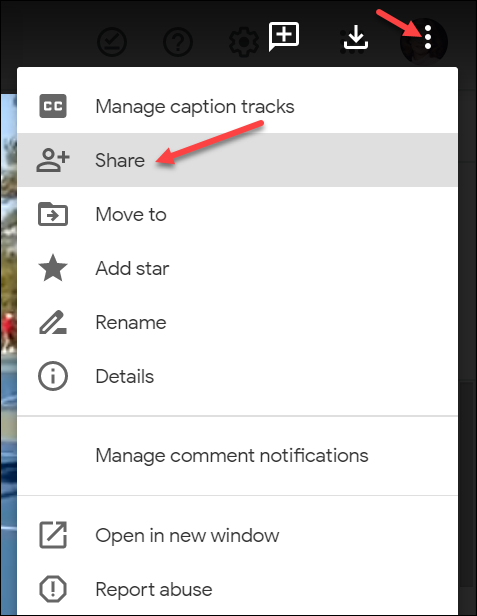
Upload your video to https://drive.google.com. Open it. Click on the three dots, then click on Share.
Click on Anyone with the link and click on click on Copy link. Then click on Done.
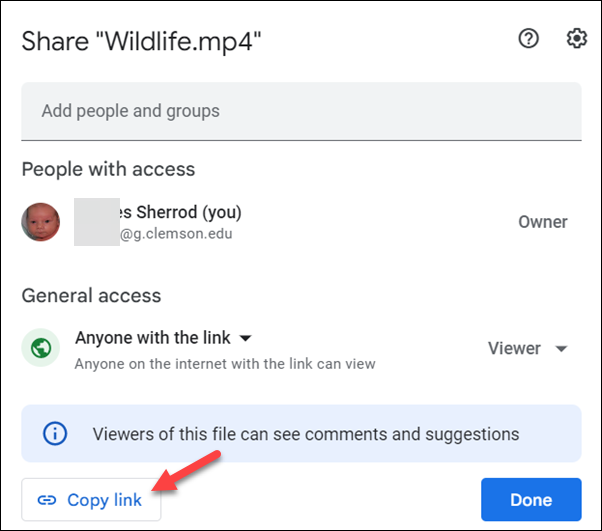
Now paste link into email or other page you want to share.
If you have more questions about this, email ITHELP@clemson.edu or call 864-656-3494.