Webex Record Video and Upload to Kaltura
Estimated Reading Time: 1 MinutesOpen your WebEx app. If you have not done it recently, make sure there are no updates to Webex. Click on the ? on the lower left side of the screen. Click on Check for updates and let it do any it finds. You may have to restart the Webex app after the update.
Click on Start a Webex Meeting.
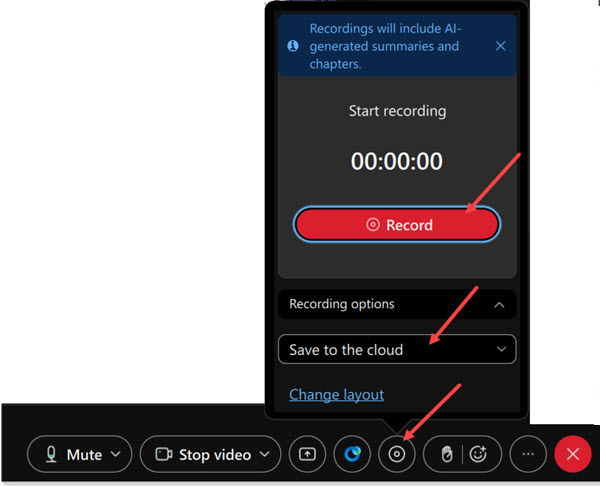
To record your meeting, click on the round Record button at the bottom and Save to the cloud. When you are finished recording you can click the Stop button. When you are finished with the meeting, click the red X in the lower right part of the screen.
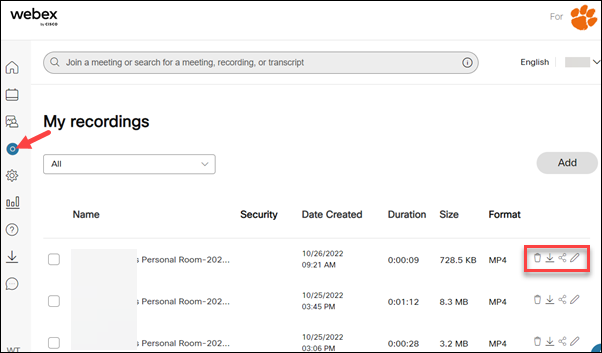
Now log in to https://clemson.webex.com on your browser and select Recordings on the left side of the screen.
If you click on a video, it will allow you to open and view it in a new browser tab.
Notice the options in the red box. You can download, delete, edit, or share your video. Under Share, you have an option to get a link to it and/or change the privacy options. To put the video in Kaltura, select the Download option.
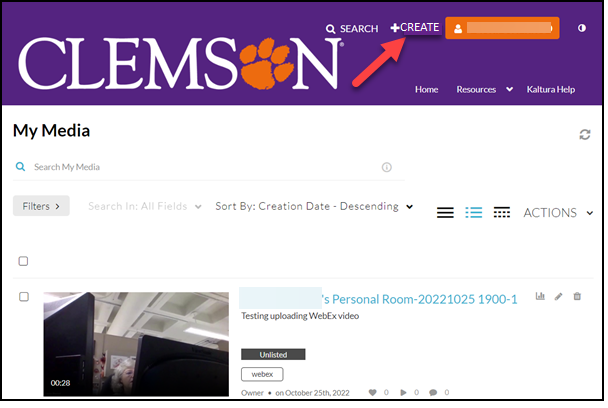
If you would like to add your Webex video to Kaltura, download it using the download option in the red box. Then log in to https://kaltura.clemson.edu and click on My Media, + Create, Upload. Upload your video here.
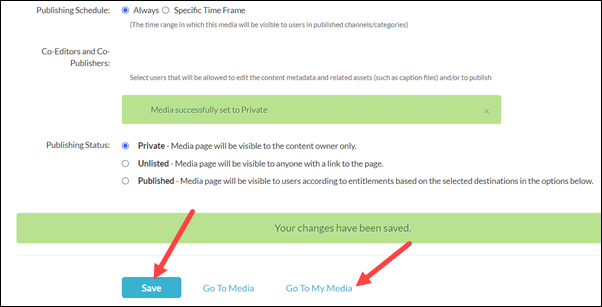
After it starts uploading, you will see several options. If you scroll down to the bottom you will see publishing status options and the Save button. After you save, you can click on Go to My Media to see the video and your other videos.
If you have more questions, email ITHELP@clemson.edu or call 864-656-3494