VOIP phone setup at home
Estimated Reading Time: 3 MinutesVOIP PHONE SETUP AT HOME
Before starting, please glance all of the way through this document. There are options for user login that may make that process easier.
You will need:
- Your VOIP phone
- Ethernet cable to plug into your home router.
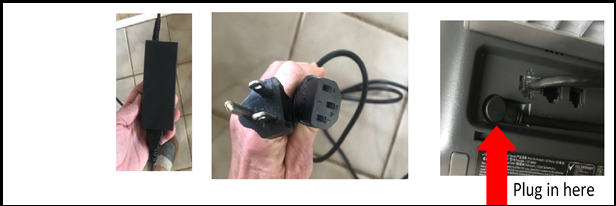
- Power adapter for your phone to be able to use it. Please contact CCIT for the power adapter. Power adapter looks like this:
Regarding Clemson domain and your username
If you have a camera on your VOIP phone, then with the use of a mobile device, navigate to: https://phoneqr.app.clemson.edu
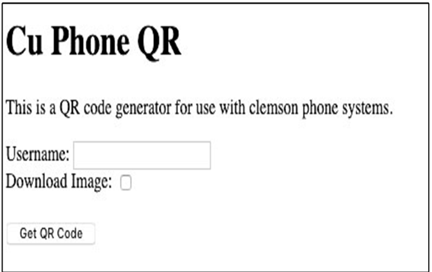
Fill out the form to generate a QR code that your VOIP phone will use to recognize the Clemson domain and your username.
You will need to have your mobile device handy with the QR code showing.
You ONLY have to create this QR code ONE time.
You can re-use it if the VOIP phone needs to be set up again
Regarding password login
You can enter your password using the VOIP phone keypad.
If you prefer to generate a 6 digit numeric passcode for your phone password, proceed to https://phonepin.app.clemson.edu/
After authentication, you will have opportunity to generate a pin.
Once pin is generated, please write it down and wait at least 10-15 minutes attempting to use. System needs time to recognize change.
You ONLY have to create this phone pin ONE time.
You can re-use it if the VOIP phone needs to be set up again,
Now you are ready to begin setting up your VOIP phone at home.
1. When you power your phone on the screen will be blank press the settings button on the phone. This will navigate to the Applications Menu. 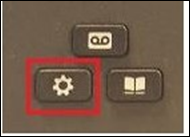
2. From the Applications, menu select Admin Settings.
(Please note your display may be slightly different depending on which applications have been programmed onto your phone.) 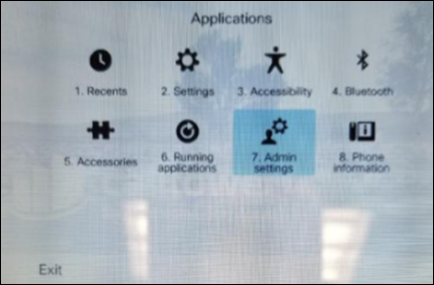
3. Select Option 4 Reset Settings to navigate to the Reset Settings menu. 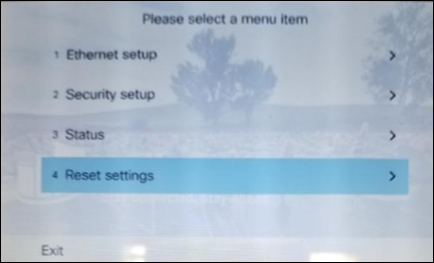
4. From the "Reset Settings" Menu select option 2 All Settings. 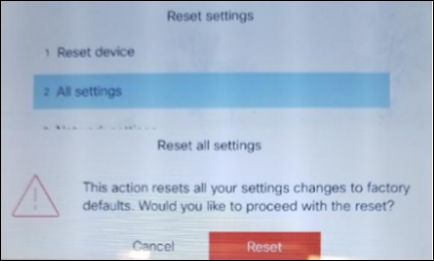
5. You will see a "Reset all Settings" confirmation pop up. Confirm the reset by pressing the reset Soft Key on your phone.
At this time the display will turn black as the phone begins the reset process. Note that you may see the phone reset multiple times as the factory reset will require the phone to update multiple systems.
6. After the service reset, the phone will reboot.
6A. If you have no camera on your VOIP phone see below: 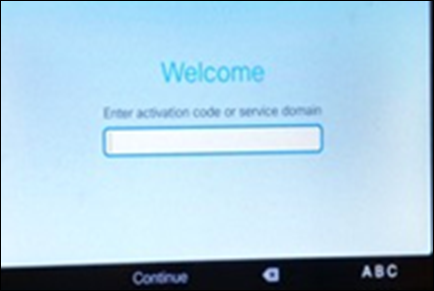
Now you are able to enter your domain and then the credentials to register your phone. Enter clemson.edu press continue. Then enter username (without @clemson.edu)
6B. If you have a camera on your phone and successfully generating a QR code for your username and Clemson domain. When VOIP phone presents an image block on the screen, hold your mobile device with personalized QR code showing up to the VOIP phone.
7. Press the Down arrow on the circle button to move to Password field
7A. If you are comfortable navigating the keypad to enter your Clemson password, then proceed.
7B. If you generated a numeric pin, be sure your keypad is set to numbers (bottom right of screen will show 123). Type in your pin.
8. Phone should show “connecting” or “registering.” After a period of time, your screen will show the numbers and shortcuts associated with it.