HOW TO: Manage Members in a Workgroup
Estimated Reading Time: 2 MinutesGroup Enrollment:
You can enroll new members individually or by batch.
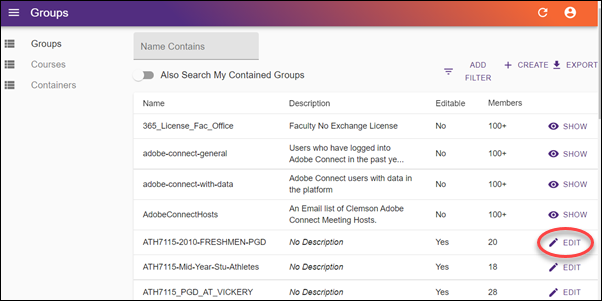
1. Go to http://central.app.clemson.edu , find your Group, click on EDIT.
2. To add users one at a time, click on Users at the top. Then click on Add User by UserID field and type in the User Name of a Clemson user. The default Role is Member. If you want the user to be an Owner, click on the Role field and change it to Owner. Then click ADD USER and SAVE.
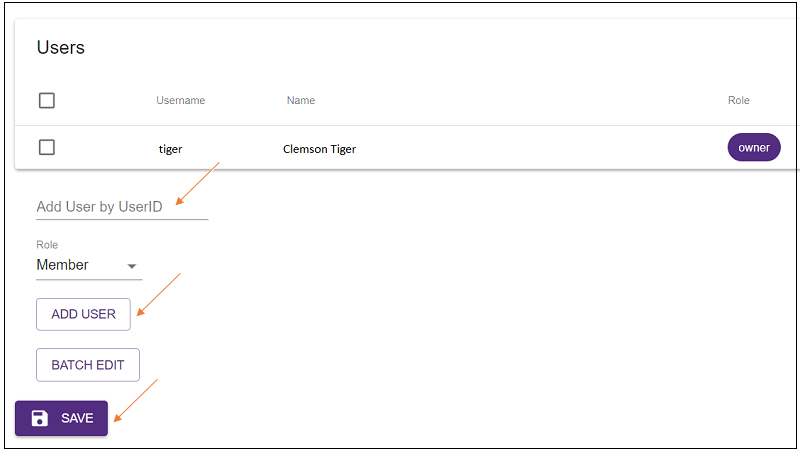
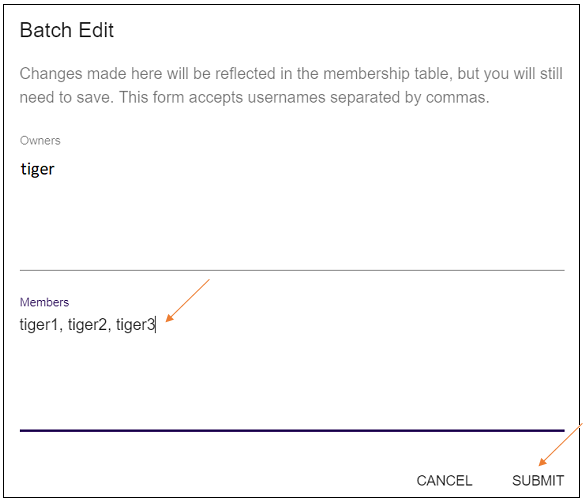
3. Or, you can add users using Batch Edit. To do this you will need a list of UserIDs separated by commas. If you have more than 1000 users, separate them into separate batches. After clicking BATCH EDIT (on previous screen), click in the Members field and type (or paste) the list of user names separated by commas. Then click SUBMIT.
4. There are many ways to get your list of user names. But one option is to use Excel. Here is a sample way you could use it. If you have your list in an Excel sheet, make a copy of it - and then delete all of the columns except the one with the Clemson UserIDs - leaving it in column A. Then in cell B1, put a comma. Copy that to all of the cells below it that have data in column A except for the last cell (we don't need a comma after the last UserID). Go back to cell C1 and type in this formula: =A1&B1 - then copy that formula to the cells below it. It would look like this sample:

5. Highlight the cells in column C that have data, copy to the clipboard (press Ctrl-C). Then go to the Members field in Central, paste from the clipboard (press Ctrl-V). This will work for up to 1000 users at a time.
If you have more questions, email ITHELP@clemson.edu or call 864-656-3494.