Setting up WebEx within your Canvas
Estimated Reading Time: 2 MinutesWEBEX CANVAS TEACHER GUIDE
Webex interfaces through Canvas with the CirQlive platform. This guide will cover:
- Turning on the Webex LTI
- Instructor account settings
- On-Screen setup
- Learn more about using Webex in Canvas
TURING ON THE WEBEX LTI PART 1
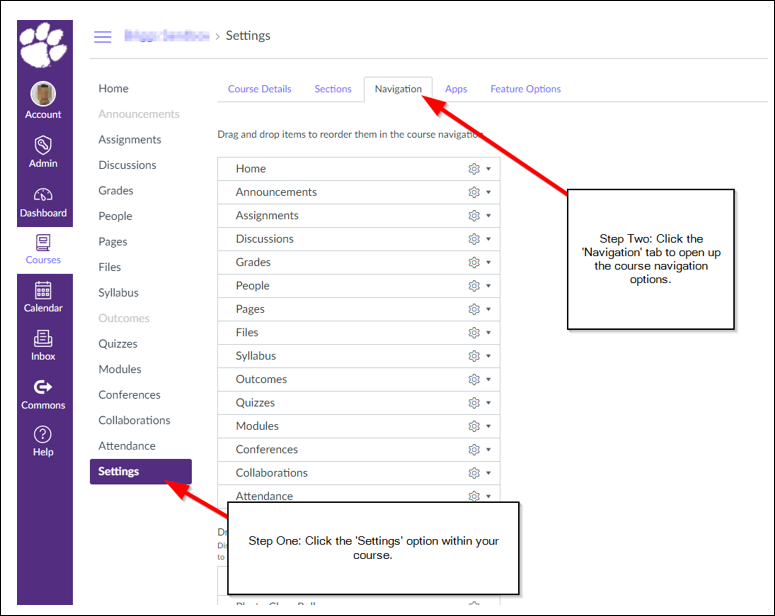
Click on the Course, Settings, Navigation.

TURNING ON THE WEBEX LTI PART 2
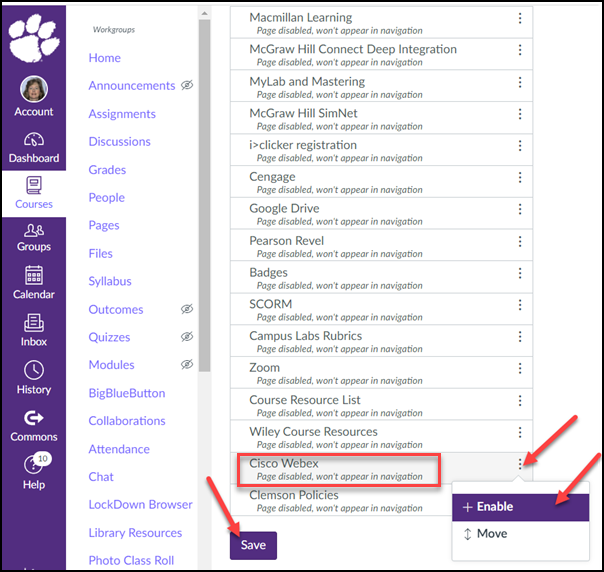
Scroll down to select Cisco Webex, three vertical dots, click on Enable. Click Save. If you want your students to see it, drag the Cisco Webex item to the course navigation list. Then scroll back down and click the Save button

INSTRUCTOR ACCOUNT SETTINGS
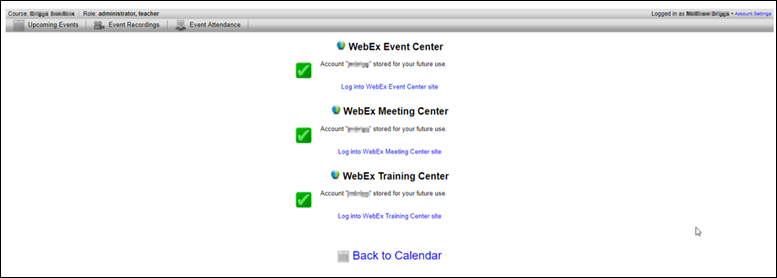
After clicking the live WebEx navigation link for the first time, your accounts will sync. Please give the system a short amount of time to complete this activity. Once the sync is complete, you may see something similar to the image below.

ON-SCREEN SETUP (FOR INSTRUCTOR)
The first time you set up Webex in Canvas, you will be asked to complete the onscreen setup. Here are the options you will see:
Choose your features
Classroom Collaborations - allows you to include WebEx Teams in your course. Classroom Collaborations are not necessary for video meetings.
Virtual Meetings - allows you to conduct video meetings with your class (similar to Zoom).
Office Hours - allows faculty to share their Office Hours availability and allow students to sign up for video meeting sessions.
Time Zone - should be “[…] Eastern (New York)” and not your time zone.
Please click the Authorize button for Authorize with LMS.
Enable Webex Meetings Attendance Grading as desired.
Reminder Bot can be enabled if you are using WebEx Teams and/or Classroom Collaboration.
TO LEARN MORE ABOUT USING WEBEX IN CANVAS, SEE THESE ARTICLES
The Webex Education Connector for Teachers
The Webex Education Connector for Students
If you have more questions about this, email ITHELP@clemson.edu or call 864-656-3494.