HOW TO: Set up a Windows 7 profile to connect to eduroam
- Click on the Network icon in the Windows taskbar.
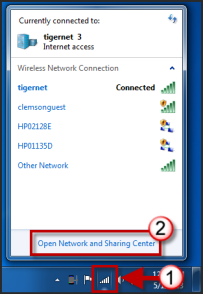
- Click Open Network and Sharing Center.
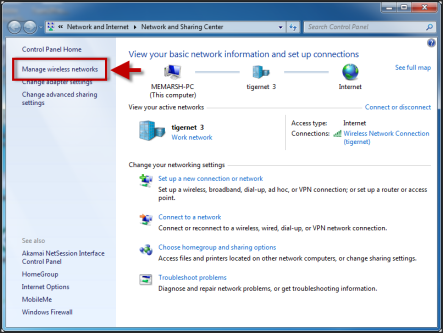
- Click Manage Wireless networks.
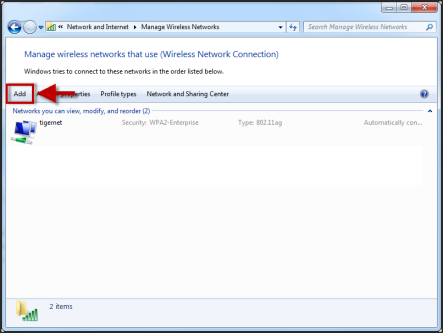
- Click Add.
- Click Manually create a network profile.
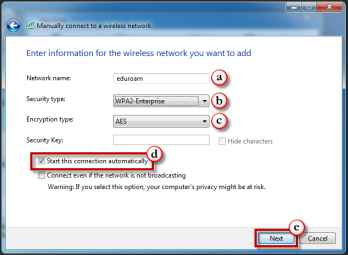
- Enter the following information in the form provided
- Network Name: eduroam
- Security Type: WPA2-Enterprise
- Encryption type: AES
- Enable the checkbox for Start this connection automatically.
- Then click Next.
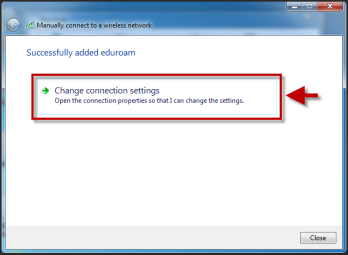
- Click Change Connection Settings.
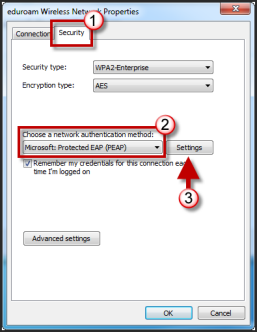
- Click the Security tab.
- Select Microsoft Protected EAP (PEAP) from the available drop down list for network authentication method.
- Then click Settings.
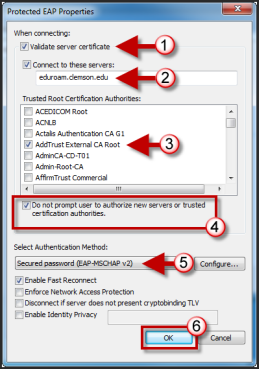
- Enable the checkbox for Validate server certificate.
- Enable the checkbox for Connect to these servers:. Then in the field provided enter eduroam.clemson.edu.
- Under the Trusted Root Certification Authorities section, enable the checkbox for AddTrust External CA Root.
- Enable the checkbox for Do not prompt user to authorize new servers or trusted certification authorities.
- From the Select Authentication Method drop down list, select Secured Password (EAP/MSCHAPv2).
- Click OK.
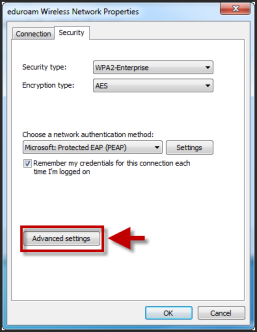
- Click Advanced Setting.
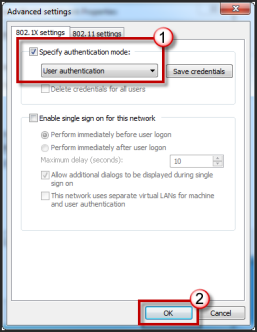
- Select the checkbox for Specify authentication mode.
- Then select User authentication from the available drop down list.
- Click OK.
- Click OK again.
- Click Close.
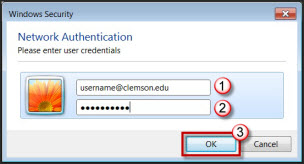
- When prompted, login to the eduroam network with your username@clemson.eduand password.
- Then click OK.
Article ID: 477
Created: December 12, 2016
Last Updated: December 12, 2016
Author: Ryan Real
Online URL: https://hdkb.clemson.edu/phpkb/article.php?id=477