There are two ways to back up your Google Drive data to your computer. You can download files or folders to your computer, flash drive, or external hard drive. Or you can use the Google Takeout app. We will give instructions for both.
DOWNLOAD YOUR GOOGLE DRIVE FOLDERS
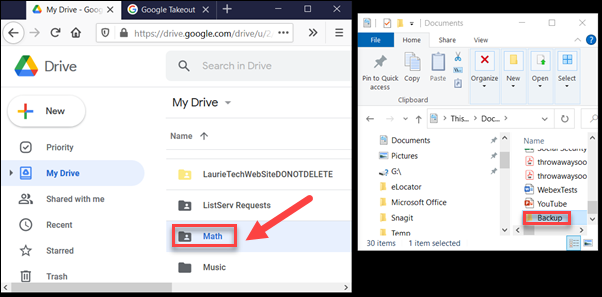
Open a browser on your computer and log in to https://drive.google.com. Select a folder (single click on it). In this example, we selected the folder named Math.
Open the File folder manager on your computer and create a new folder to store the data in. In this case, we created a folder named Backup.
Right click on the Google Drive folder and select Download.

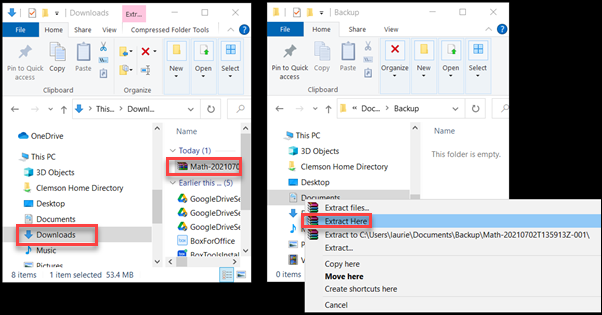
Unless you point it somewhere else, the downloaded .zip file will land in the Downloads folder. Click on the Zip file to be offered to extract the files. When you release the mouse button, it will offer to extract the files.
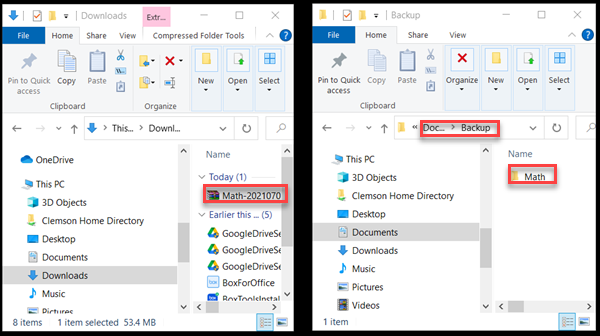
Once the files are extracted, it will look something like this. Note that our folder Backup now has a subfolder Math that has the files from the Drive folder in it. Note that if the files are Google format, when you click to open one, it will open a browser with the corresponding Google App. If it's a MS Office file, video, picture, .pdf, etc. it will open in the computer application associated with that file type.
You can do this same process with any folders in your Google Drive - one at a time.
USING GOOGLE TAKEOUT TO BACK UP GOOGLE DRIVE DATA
The second way to do this is with Google Takeout. Takeout will let you back up anything stored in your Google Apps - and this list is pretty long. Here we will download the data from Google Drive only.
Go to https://takeout.google.com.
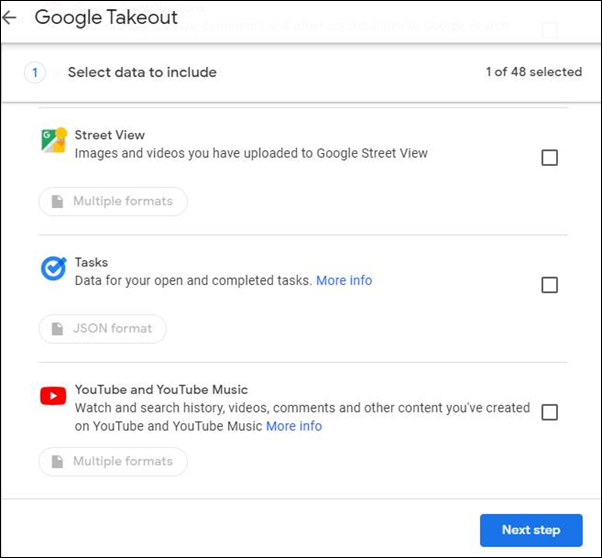
It will ask which data to include. It may default to selecting all items, but you can deselect individual items or all items and then reselect the ones you want to back up. Click on Next step. In this example we will select only Google Drive data.
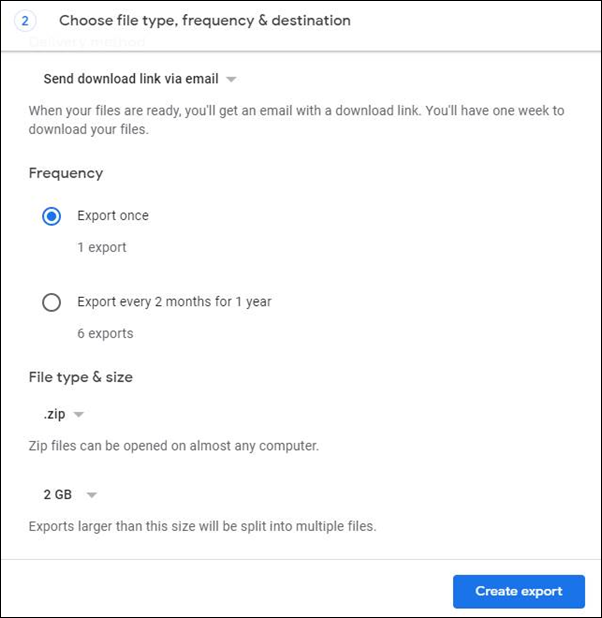
It will ask about Type, Frequency, and Destination. Under Destination you have the choice to transfer to a link via email, Add to Google Drive, Add to a Dropbox account, or Add to a Box account.
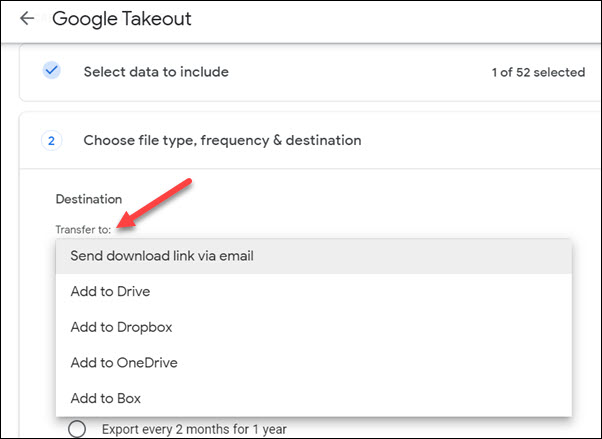
Make your selections and click on Create export.
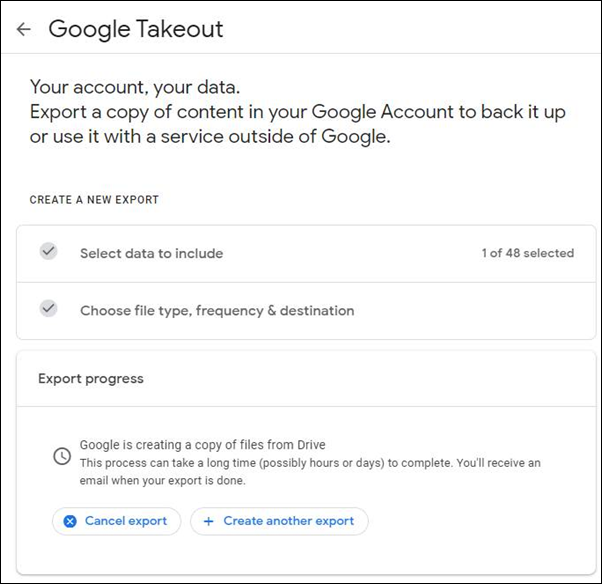
Next you will see the export progress screen. This may take a while depending on the amount of data and your Internet speed.
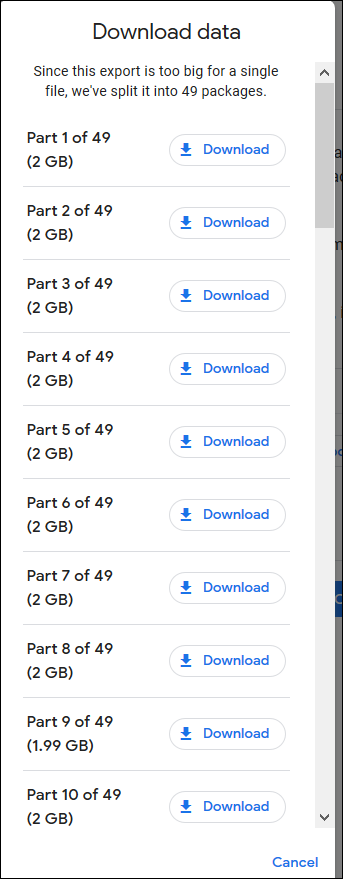
When it is finished, you will get a choice to Manage your exports. Note the amount of time it takes depends on how much data and the speed of your Internet Connection. In this example, we had ~100 GB, so it split it up into 49 2 GB zip files. Click on Show exports to see the files.
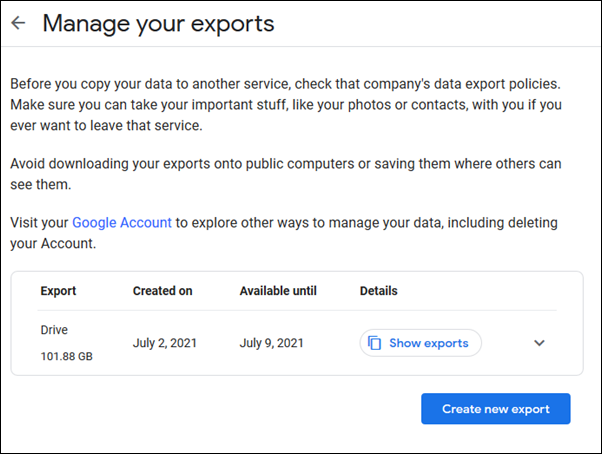
Click on Download to download each individual file.
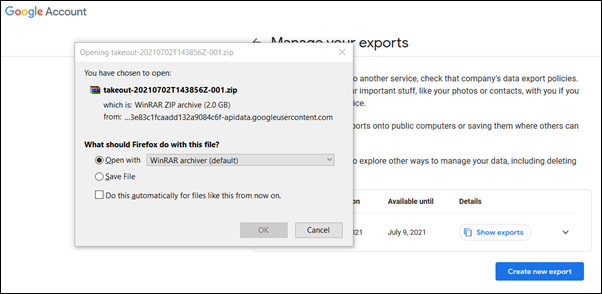
Depending on what you have installed on your computer, you may be given an option to use an unzip program to extract the files - or you may just Save File and then click on it to extract.
If you have more questions, email ITHELP@clemson.edu or call 864-656-3494.
Article ID: 2276
Created: July 2, 2021
Last Updated: October 18, 2023
Author: Laurie Sherrod
Online URL: https://hdkb.clemson.edu/phpkb/article.php?id=2276